Friday, May 31, 2013

Mee Hoon Kueh 面粉粿

This is my first time hands on handmade Mee Hoon Kueh! To make it fun for eating I cut out the dough using my cute cookie cutters! Kids will sure enjoy this bowl of cutee homemade 面粉粿 ^o^


hehehe she has no strength to knead the dough, just for show only ^.^


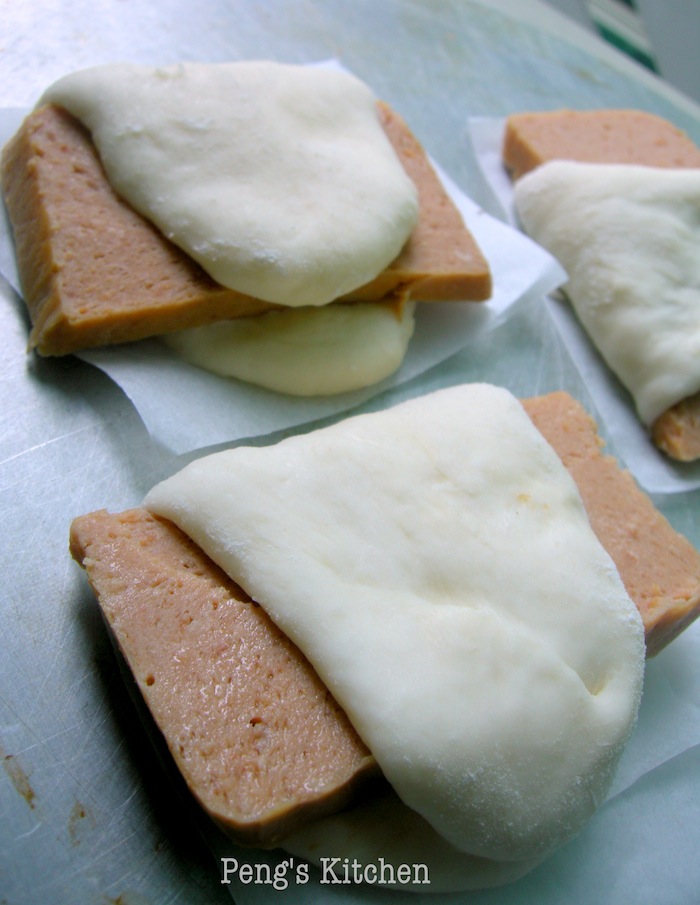
portions of dough after resting for 1 hour


cute yah!

Recipe source : Nasi Lemak Lover
Dough
Ingredient
  • 500gm plain flour
  • 200ml water
  • 1 egg, lightly beaten
  • 1 tsp salt

Method
  1. Mix flour, egg and salt in a large mixing bowl.
  2. Slowly add in water and knead till dough is smooth, about 5mins.
  3. Divide dough into 6 portions, approx 125gm each, cling wrap and rest for at least 1 hour or more.

Ikan Bilis (Anchovy) Soup Base
Ingredient
  • 100gm ikan bilis washed thoroughly
  • 2L water
  • salt to taste

Method
  1. Place ikan bilis in water and bring to boil.
  2. Lower heat and simmer for 45mins.
  3. Add salt to taste.


Garnishing
  • 200gm minced pork (marinate with 1 tsp sesame oil,  1/2 tsp wine, 1 tsp light soy sauce, pepper, cornflour)
  • Baby Bok Choy or any leafy vegetables
  • Eggs
  • Fishcake (optional)
  • Sesame oil
  • White pepper
  • Fried ikan bilis
  • Fried shallots
  • Tong Choy (preserved vegetables)

To cook one bowl per person :
  1. Pour appropriate amount of soup base into a saucepan. Bring to boil.
  2. Add in some minced pork, tong choy and fish cake. 
  3. Tear the dough ball into small and thin pieces and drop it into the boiling soup. (alternatively : roll out each dough into thin sheet, cut out using cookie cutter)
  4. Cook for 1 min. Add in a egg and cook briefly. Add in some sesame oil & pepper to taste. Remove from heat.
  5. Serve with fried ikan bilis and fried shallots.


Wednesday, May 29, 2013

Burnt Bottom Vermicelli with Seafood 海鲜焦底米粉

I'm so productive in kitchen this month...testing on new bakes and cooking :) Just when am trying to slow down my pace, thanks Wendy for linking me the blog article on Seafood Long Di Meehun aka 海鲜焦底米粉 hahaha...cannot resist the temptation so rush out this dish before MFF Sabah ended :)

Compare to the previous pork gravy version, I prefer this seafood burnt bottom vermicelli! Simply because I'm a seafood lover hahaha...so you can see that my bowl of vermicelli is piled up with lots of ingredients ^o^ Based on the previous recipe, I further improvise on the taste. This time round the gravy taste more rich, which I like, most likely attributed by the amount of seafood used :) 

Ohhhh school holidays is around the corner! Hopefully the kids will not drive me nuts in this one whole month and I can have more time to play around in the kitchen! ^0^


Recipe by Peng's Kitchen
Ingredient (2 adults + 2 kids servings)
  • 150gm rice vermicelli
  • 6 eggs
  • 4 cloves garlic, minced
  • 200gm sliced squid
  • 150gm prawn, shelled
  • 180gm chicken breast, sliced (can replaced with fish if u like)
  • 1 tsp light soy sauce
  • 1 tsp sesame oil
  • 1 tsp wine
  • pinch of salt
  • 1 tsp corn flour
  • 150gm baby choy sum
Gravy : mix well
  • 3 cups hot water 
  • 4 tsp oyster sauce
  • 5 tsp light soy sauce
  • 1 tsp dark soy sauce
  • 1 tsp salt
  • 1 tsp pepper
  • 2 tsp sugar
  • 1 tsp sesame oil
  • 5 tsp corn flour + 1 tbsp water

Method
  1. Marinate chicken breast meat with light soy sauce, sesame oil, wine, salt & corn flour.
  2. Soak rice vermicelli in water until softened. Drain dry.
  3. Heat 2 tbsp oil in wok. Pour in beaten eggs (2 eggs at a time) and let the egg spread on its own. Put in a portion of drained rice vermicelli onto the egg and fry the egg until the base is golden.
  4. Flip the omelette and fry the other side with rice vermicelli until slightly charred. Dish up onto a deep serving dish, omelette side up.
  5. Put in 2 tbsp oil and saute garlic until fragrant. Add in chicken slices and stir fry until the meat is lightly browned.
  6. Add in squid and prawns and stir briefly on high heat till prawn turn slightly pink.
  7. Add in choy sum and toss evenly.
  8. Add gravy and bring to boil. Add cornstarch mixture and stir till gravy is thickened.
  9. Pour the seafood gravy over the omelette and serve.

I am submitting this to Malaysian Food Fest Sabah Month hosted by Mary Of a Pepper's Love

Tuesday, May 28, 2013

Steamed Luncheon Meat Buns

To be true, I seldom serve spam meat to my kids as you know it is loaded with sodium and preservatives. So when I make this simple steamed spam meat buns for my boy for tea-break, he can't get enough of it, keep saying very very nice! hahaha...


before steaming...

all puffed up after steaming :D


Ingredient (9 buns)
  • 200gm  Hong Kong Flour (sifted)
  • 5gm instant yeast
  • 1 tsp double acting baking powder
  • 50gm sugar
  • 10gm shortening 
  • 70ml-100ml water
  • 9 slices spam (luncheon) meat

Method
  1. Combine hong kong flour, instant yeast and double acting baking powder together.
  2. Dissolve  sugar in a bowl with 80ml water.
  3. Make a well in the flour mixture and pour in the sugar solution. Combine well and gather into a dough. Add a tablespoon of water if it is too dry.
  4. Add the shortening and knead until a smooth dough (Dough should be soft and may even be a little sticky, but it is okay)
  5. Place dough in a greased bowl and prove it for 45 minutes or until almost double in size.
  6. Knead dough a couple of times and roll into a long strip. Cut into 40gm pieces.
  7. Roll into a flat disc and wrap with a slice of luncheon meat.
  8. Leave to rest for about 10 minutes before steaming over preheated steamer at high heat for 10mins.

Wholemeal Pork Floss Bun

Finally I've made this pork floss bun which I've pending for very long! I usually make small batch of bread which can be consumed within 2-3 days. Most of the time small buns will be completely wipe off by the 2nd day :D So I love making small buns rather than a huge loaf of bread which may takes some time for my small family to finish. 


Ingredient (6 buns)
  • 100gm bread flour
  • 50gm wholemeal flour
  • 35gm cake flour
  • 10gm milk powder
  • 30gm sugar
  • 2gm salt
  • 8gm instant yeast
  • 15gm beaten egg
  • 50gm water
  • 50gm water roux, 汤种
  • 25gm unsalted butter, softened
Garnish : Pork Floss & Mayonnaise


Method (hand knead)
  1. Combine flour, milk powder, sugar, salt and yeast in a mixing bowl. Add in water roux and stir to mix. Add in egg and water, mix into a rough dough. Knead for 5mins.
  2. Add in softened butter and continue to knead until smooth and elastic, for 10 mins. Cover and proof for 60mins or until double in bulk.
  3. Lightly punch dough down and knead lightly to release gas. Shape into round and rest for another 15mins.
  4. Divide dough into 6 equal portions (approx 60gm each). Shape each dough into a long oval shape. Proof for another 50mins or until double in bulk.
  5. Bake in preheated oven at 180 deg cel for 15mins or until golden brown.
  6. Cool completely on wire rack.
  7. Slit each bun on the long side. Spread in some mayonnaise and all over the surface. Coat evenly some pork floss.


sliced with a knife...

To show the texture is soft & chewy, I took a mouthful and the bread actually returned to its original shape. :D


Monday, May 27, 2013

Wholemeal Pandan Coconut Buns

Finally ending my last GREEN bakes for this month! ^.* So far this is my 2nd pandan flavoured bread making :) I loved the combination of this gula melaka coconut filling with lightly infused soft pandan bread. It is also my first attempt in trying out a new shaping method. It looks rather tricky to fold out the dough with all the grated coconut. As I only left with 3 large paper liner, therefore only made 3 patterned buns and the balanced dough I just shaped into normal round shape :) Next round I will use ham & cheese filling to see how it will turns out! 


65C Tangzhong, Water Roux 
Ingredient

  • 125gm fresh milk/ water
  • 25gm high protein flour

Method

  1. Pour milk into a small saucepan, add in flour and stir till flour is well dissolved.
  2. Cook over low heat and whisk continuously till a smooth paste is formed (I do not have a thermo to check whether the dough reaches 65C, but it roughly takes about 2mins)
  3. Cover the paste with a cling wrap touching the surface, leave to cool completely before using. Balanced to be chilled in fridge, use within 3 days.


Gula Melaka Coconut Filling 
Ingredient
  • 250g grated coconut
  • 160g gula melaka, chopped finely
  • 30g sugar
  • 3 tbsp water
  • 2 tsp corn flour
  • 2 pandan leaves, cut

Method
  1. Boil both sugar, water and pandan leaves in a small pot until sugar has dissolved. 
  2. Add in grated coconut and corn flour and cook on medium low until fairly dry. 
  3. Discard the pandan leaves and cool down completely before use.


Ingredient (8 buns)
  • 140gm bread flour
  • 60gm wholemeal flour
  • 55gm cake flour
  • 15gm milk powder
  • 30gm sugar
  • 3gm salt
  • 8gm instant yeast
  • 30gm beaten egg
  • 65gm fresh pandan juice
  • 3/4 tsp pandan paste
  • 70gm water roux, 汤种
  • 25gm unsalted butter, softened
  • gula melaka coconut filling

Method (hand knead)
  1. Combine flour, milk powder, sugar, salt and yeast in a mixing bowl. Add in water roux and stir to mix. Add in egg, milk & pandan paste and mix into a rough dough. Knead for 5mins.
  2. Add in softened butter and continue to knead until smooth and elastic, for 10 mins. Cover and proof for 60mins or until double in bulk.
  3. Lightly punch dough down and knead lightly to release gas. Shape into round and rest for another 15mins.
  4. Divide dough into 8 equal portions (approx 60gm each). Roll out each dough into an oblong shape, spread some coconut filling over and roll it up like a swiss roll. (refer to pics above). Seal all edges tightly. Flatten dough and roll out slightly. Fold into 1/2.  Slit a cut in the middle, do not cut through the base, turn out the dough and place on a paper liner. Proof for another 50mins or until double in bulk.
  5. Bake in preheated oven at 180 deg cel for 15mins or until golden brown.


Sunday, May 26, 2013

Pandan Cheese Chiffon

Oh my you all must be getting eye sore seeing my GREEN bakes these couple of days! Do not worry I will be ending your misery soon hahaha >0< ...

This pandan cheese chiffon does not taste as flavourful as the normal pandan chiffon as it does not contain coconut milk. But the texture is absolutely wonderful! It is so cottony soft just like a piece of cotton! As it is so soft and light, me and my boy can just eat 2 slices at one go :D This 9" cake was gone within less than 2 days! 


I've disfigured the bottom when I tried to unmould it, that is why there are no pictures of the whole unmoulded chiffon cake hehehe...


Recipe source : My Sweet Hut
Ingredient
A
  • 40gm butter
  • 125gm cream cheese
  • 60gm pandan milk (concentrated fresh pandan juice + 1 tbsp milk powder)
B
  • 35gm cake flour
  • 15gm corn flour
  • 1/4 tsp salt
C
  • 5 egg yolks
  • 3/4 tsp pandan paste
D
  • 6 egg whites
  • 1/4 tsp cream of tartar
  • 90gm caster sugar

Method

  1. Double (A) until smooth. Cool slightly.
  2. Sift (B) in to cheese mixture and mix evenly.
  3. Whisk in (C) gradually till combined.
  4. Using a electric whisk, beat egg whites and cream of tartar until foamy. Gradually beat in sugar, on high speed, until stiff peak formed.
  5. Fold in 1/3 of the meringue into the egg yolk mixture until combined.
  6. Pour the yolk mixture into the balanced meringue and fold gently till combined.
  7. Pour batter into a ungreased tube pan and bake in preheated oven at 180 deg cel for 40-45mins. 
  8. Remove cake from oven and invert cake on wire rack to cool completely before unmoulding.


Saturday, May 25, 2013

Bánh Bò Nướng, Vietnamese Honeycomb Cake

It started to rain cats and dogs after this cake is out from oven...sigh no natural lights for proper photo shooting and worst till I'm just using my normal old digital camera. All the pictures turned out just gloomy.....but the taste of the cake save the day! It has honeycomb, and it should looked this way, if not the cake will be a failure, and it is very chewy! My parents and kids all given thumbs up for this lovely GREEN cake hehehe :)

I never been to Vietnam and the most familiar Vietnamese dish to me are Vietnamese Spring Roll (nem cuốn) and Vietnamese Rice Noodle Soup (Pho) :D Hope to attempt these 2 dishes soon! Too little time too many recipes to try >0<


Recipe source : Asiadish.com
Ingredient
  • 200ml coconut cream (kara brand)
  • 150gm sugar (can increase to 180gm-200gm if u have a sweet tooth)
  • pinch of salt
  • 6 large eggs
  • 3/4 tsp pandan paste (koepoe brand)
  • 240gm tapioca starch
  • 2.5 tsp baking powder, single acting

Method
  1. In a saucepan, dissolve sugar with coconut milk and a pinch of salt under low heat. Set aside to cool down.
  2. Grease a 9"x5" non-stick loaf pan. Preheat oven together with the pan at 180 deg cel.
  3. Crack eggs in a mixing bowl. Use a fork to break up the eggs. Do over over-stir, STIR just enough to homogenize the whites & yolks.
  4. Stir in pandan paste.
  5. Add in coconut mixture and stir gently.
  6. Sift tapioca starch into the mixture. Fold gently. It will be lumpy. Use a strainer to strain the mixture into another mixing bowl.
  7. Sift in baking powder and stir gently. You will see small bubbles appearing. Strain the mixture again.
  8. Pour the batter into the heated pan and bake for 45mins or until golden brown and centre is set.
  9. Cool cake in the pan for 10mins. Use a silicon spatula to dislodge the cake onto a wire rack to cool completely.

Thursday, May 23, 2013

Pandan Sugee Butter Cake

This is a sugee cake with a twist! Traditional sugee cake is actually very sinful as it is loaded with large amount of egg yolks! This particular recipe uses lesser eggs just like a normal butter cake, but I find the butter is too much, 300gm butter for a 7" cake!  The baking paper was smeared with  oil when I removed it from the cake >.< Though it makes the cake moist and flavorful, I will reduce the butter slightly if I attempt this cake again :) Besides the moist and lovely pandan flavour, I absolutely loves the soothing green hue ^.^ and yes like any other butter cake, it taste better after the following day! 


Ingredient
  • 300gm butter (I will reduce the amount next time)
  • 190gm sugar
  • 4 eggs
  • 120gm cake flour
  • 5gm baking powder
  • 200gm semolina
  • 200ml fresh milk
  • 1 tsp pandan paste (Koepoe brand)

Method
  1. Soak semolina with fresh milk for 6 hours. (I chill it overnight)
  2. Beat butter and sugar until creamy.
  3. Add in eggs, one at a time, beating well after each addition. Beat in pandan paste.
  4. Sift in flour & baking powder, alternate with soaked semolina.
  5. Spread batter into a lined 7" square pan. Bake in preheated oven at 160 deg cel for 60mins or until a skewer inserted comes out clean.
  6. Cool in pan for 10 mins before unmoulding onto wire rack to cool completely.
Recipe adapted from Kevin Chai's I Love Butter Cake Too


Wednesday, May 22, 2013

CocoPandan Cake

This is my first time using Koepoe brand pandan paste and is taste better than any other brands I've used! Very natural aftertaste and the green hue is fantastic! a little goes a long way.....The first recipe I tested using this pandan paste is the CocoPandan Cake by WendyinKK :) I did not use any fresh pandan juice as stated in the original recipe. I've replaced it with 1 tsp pandan paste and some milk, therefore this cake is so GREEN compared to Wendy's one ^0^. I will reduce the pandan paste next time if I make this cake again. Other than the shocking green hue, the flavour of the cake is wonderful! Me too loves bakes with pandan and coconut! So you will see more cakes using koepoe koepoe pandan paste in my blog in the coming days ^.*


Recipe adapted from WendyinKK with some modifications 
Ingredient
(A)

  • 200gm self raising flour, sifted
  • 150gm fresh grated coconut
  • 150ml milk
  • 1 tsp pandan paste
  • 125gm butter
  • 70gm sugar
  • 2 egg yolks

(B)

  • 2 egg whites
  • ½ tsp cream of tartar
  • 50gm sugar


Method
  1. Preheat oven at 180 deg cel. Line a 9" x 5 cm loaf pan.
  2. Beat (B) until stiff enough to defy gravity when overturned, but still has droopy peaks. Set aside.
  3. With the same beaters, beat butter and sugar until pale and fluffy. Put in egg yolks one after the other, beating well and scrape the bowl after each addition.
  4. Combine milk with pandan paste.
  5. Sift in flour and fold into butter mixture, alternate with milk. 
  6. Put in grated coconut and mix.
  7. Put 1/3 of beaten egg whites into batter and FOLD.
  8. Put in another 1/3 and FOLD.
  9. FOLD in final batch of egg whites.
  10. Pour batter evenly onto prepared pans and bake for 40 minutes or until skewer inserted comes out clean.

Monday, May 20, 2013

Cow Dung Pile @ UFO Tarts

Ignore the unpleasant name or unsightly picture of this pastry...hehehehe it actually taste good or should I say fantastic! ^0^ My first attempt did not goes well but it did affect the taste. As my kids love this pastry alot, including me of course, I attempted again the following day :) This time round the colour and shape looked so much better than the first try.


(Below pics) 1st attempt, did not control the heat well, so the meringue collapsed slightly before it can be browned properly.


Recipe adapted from WendyinKK
Ingredient (8 pies)
Tart Base
  • 60gm butter
  • 50gm sugar (I used 40gm)
  • 1 egg
  • 1/2 tsp vanilla paste
  • 50gm cake flour, sifted with 1/2 tsp baking powder
Custard 
  • 1 egg yolk
  • 1 tbsp sugar
  • 1/2 tsp vanilla paste
  • 1 tsp custard powder
  • 1 tsp plain flour
  • 50gm milk
Meringue
  • 1 egg white
  • 1/8 tsp salt
  • 1/4 tsp cream of tartar
  • 2 tbsp sugar (I used 1.5 tbsp)
  • few drops of vanilla

Method
  1. Beat butter with sugar until pale. Beat in egg until creamy and fluffy. Beat in vanilla. Fold in flour. Scoop batter into 8 disposable aluminum foil pan. Bake in preheated oven at 180 deg cel for 12 mins.
  2. Meanwhile prepare custard. Place egg yolk and sugar into a microwavable bowl and whisk until combined. Add in custard powder and flour and whisk until smooth. Mix in milk. Zap in microwave on high for 30 secs and stir. Zap for another 30 secs. Let it cool down.
  3. Prepare the meringue. Beat egg white with salt & cream of tartar until frothy. Add in sugar gradually and beat until stiff. Add in vanilla and beat lightly till combine.
  4. When the base are done, remove them from the pan and divide the custard filling equally.
  5. Pipe the meringue using a 7mm round tip around and on top of the custard.
  6. Grill at 180 deg cel for 5 mins or until browned. Serve warm.
I am submitting this to Malaysian Food Fest Sabah Month hosted by Mary Of a Pepper's Love
Related Posts with Thumbnails