Tuesday, April 28, 2015

Steamed Herbal Chicken Drumlets


Let's have some nourishing chicken dish tonight! Sweet and rich herbal flavour which I could not resist drenching my bowl of hot rice with the herbal broth. Love the idea of removing the skin of the chicken drumlets as this greatly reduce the oiliness of this dish and I can slurp down all the nourishing broth without feeling any guilt. ^0^

Simple herbal ingredients (red dates, wolfberries, Dang Gui, dried longans, YuZhu


Recipe ref : honeybeesweets
Ingredient
  • 12 chicken drumlets, skin removed
  • 6 seedless red dates
  • 10 pieces dried longan
  • 6 pieces Yu Zhu, 玉竹
  • 4 pieces Dang Gui, 当归
  • 2 tbsp wolfberries
  • 1 tbsp hua tiao jiu
  • 1/2 tsp salt
Marinade :
  • 1 tbsp light soy sauce
  • 1 tsp sesame oil
  • dash of white pepper

Method
  1. Combine chicken drumlets with marinade ingredients and marinate for at least an hour.
  2. Rinse all herbs. In a small bowl combine herbs, except wolfberries, with a cup of water and soak for 15 mins.
  3. Arrange marinated chicken drumlets in a deep dish. Pour in soaked herbs and seasoning and scatter wolf berries over the top.
  4. Steam over medium high heat for 15 mins. 
  5. Serve immediately with steamed rice.

This post is linked to the event, Little Thumbs Up organised by Bake for Happy Kids and My Little Favourite DIY, and hosted by Diana from the Domestic Goddess Wannabe 

Thursday, April 23, 2015

Pesto Chicken Quesadilla

My hubby called this lazy meal whenever he saw this being served! >.<" hahaha But I love preparing this for my family as they are easy to prepare and taste absolutely wonderful! 


Spread a flour tortilla with homemade pesto, filled 1/2 side with choice of your greens and cheese and top with freshly grilled shredded chicken....do not attempt to overfill it! You want the quesadilla thin and crisp enough without overspilling of fillings ;)


Fold up the flour tortilla and press down lightly and firmly. Brush with melted butter on both side and place it in a heated griller and cook till golden brown!


Best serve while is still hot which the quesadilla is crisp and fillings are melty good!

Ingredient (4 servings)
  • 2 chicken breast meat
  • 2 tbsp Worcestershire sauce 
  • 1 tsp honey
  • 1/2 tsp black pepper
  • 1/2 tsp salt
  • 1 tbsp olive oil
  • 4 pcs flour tortilla 
  • 2 homemade pesto cubes
  • melted butter 
toppings :
  • tomatoes
  • shredded cheddar cheese
  • baby spinach
  • fresh herbs

Method
  1. Butterfly chicken breast meat to make it thinner. Marinate with Worcestershire sauce, pepper, salt and olive oil for at 30mins.
  2. Heat a non-stick pan and pan fry the marinated meat on medium heat for 3-5 mins on each side till lightly brown.  Cool down slightly and slice thinly.
  3. Meanwhile heat up the sandwich griller. Brush some pesto over the flour tortilla. Layer with the toppings and shredded chicken evenly on one side of the tortilla. Do not overfill it.
  4. Fold up the tortilla and brush both sides with melted butter. Place the half-folded tortilla into heated griller and cook till golden brown on both sides.
  5. Cool down the pesto chicken quesadilla slightly and cut into half. Serve immediately with beds of fresh salads if desired.

This post is linked to the event, Little Thumbs Up organised by Bake for Happy Kids and My Little Favourite DIY, and hosted by Diana from the Domestic Goddess Wannabe 

Wednesday, April 22, 2015

Creamy Pesto Pasta

I so glad that my 2 kids have learnt to accept the taste of basil! Now I've stock of frozen pesto cubes in my freezer whereby I can whip up simple pesto pasta any time for them. I love this healthier version of Creamy Pesto Pasta without added cheese and cream...dairy free! 


Homemade Pesto Sauce without cheese

Basil Pesto 
Ingredient
  • 1 cup toasted walnuts
  • 150gm fresh basil leaves
  • 2 cloves garlic, chopped
  • 2/3 cup olive oil
  • salt and black pepper to taste

Method
  1. Bring 4 cups salted water to a boil. Add in basil and submerge with a spoon. Immediately remove from heat and drain in a colander. Rinse with cold water and pat the leaves completely dry with paper towels.
  2. In a food processor, add in walnuts, basil and garlic. Blend until nuts are finely chopped. Season with salt and pepper. Add in olive oil gradually and process until mixture is smooth. Use immediately or scoop portion into ice cube tray and freeze till hard. Dislodge the frozen pesto cubes from the tray and store in ziplog bag. Continue to freeze till use. 


Preparing creamy pesto sauce without the cream! The creamy paste is actually a concoction of cashew nuts and water.

Toss in cooked pasta to coat the sauce and ready to be served!

Creamy Pesto Pasta
Ingredient (2 servings)
  • 1/4 cup raw whole cashew nuts
  • 100ml water
  • 1 cube frozen pesto
  • 120gm linguine or your choice of pasta
  • salt and pepper to taste 
  • chopped parsley for garnishing


Method
  1. Cook the pasta accordingly to package instructions.
  2. Meanwhile, in a food blender, process cashew nuts and water until mixture is creamy liked.
  3. Heat the cashew cream in a pan over low heat. Add in pesto cube and stir till combine. Add salt and pepper to taste. 
  4. When the pasta is cooked al dente, drain and toss into the creamy pesto sauce. If its too thick, add in tbsp of reserved pasta water. Turn off heat. Serve hot and garnish with chopped parsley.


Thursday, April 16, 2015

A.B.C Cake

The man in the house has been bugging me to make him some bananas cake, finally I fulfilled his wish today! :D hahaha you must be wondering why called it A.B.C Cake? This is actually a simple banana cake with a twist ie. with added ground almond, chia seeds and of course the bananas. Therefore I called it Almond Banana Chia Seeds Cake in short A.B.C Cake ^0^


Original recipe asked for icing sugar frosting on top, but I opted a healthier version by topping with lots of almond flakes :D

Moist and tender crumbs and I love the crunch of the chia seeds 


Ingredient

  • 3 eggs
  • 120gm light brown sugar
  • 125ml rice bran oil
  • 1 tsp vanilla paste
  • 180gm self-raising flour
  • 1/2 tsp ground cinnamon
  • 60gm almond meal
  • 2 heap tbsp chia seeds
  • 2 ripe bananas, mashed
  • 1 carrot, peeled & finely grated
  • handful of almond flakes

Method
  1. In a medium bowl, whisk eggs and sugar until frothy. Whisk in oil and vanilla.
  2. Sift flour and ground cinnamon over the egg mixture and fold lightly. Stir in almond meal and chia seeds.
  3. Lastly fold in mashed bananas and grated carrots till well incorporated. 
  4. Pour batter into a lined 7" cake pan. Sprinkle almond flakes over the surface. Bake in preheated oven at 180 deg cel for 35 mins until golden brown and skewer inserted comes out clean. 
  5. Cool in pan for 10 mins before unmoulding onto a wire rack to cool completely. 


Friday, April 10, 2015

Prawn Paste Chicken (Har Cheong Gai)

This is an all time favourite chicken dish which no one could resist it! So sinful and addictive which you will stop munching after savoured one :D This recipe is slightly different from the usual one which I've come acrossed. It incorporated additional preserved fermented beancurd into the seasoning. Is it because of the additional fermented beancurd, I find them tasted really flavourful! 


Recipe ref : Good Food Magazine Jan 2012
Ingredient
  • 15 chicken mid wings
  • 1 piece preserved fermented beancurd
  • 2 tsp shrimp paste
  • 1 tsp oyster sauce
  • 1/4 salt
  • 4 tsp sugar
  • 4 tsp hua tiao jiu
  • 1 stalk spring onion, finely chopped
  • thumb-sized ginger, finely chopped
  • tapioca flour for coating

Method
  1. Rinse the chicken wings and pat dry. 
  2. Mash fermented bean curd till smooth. Add in the rest of the seasoning and stir well to combine.
  3. Coat the chicken in the marinade and leave in fridge overnight. Turn the chicken occasionally to ensure they are evenly marinated.
  4. When ready to cook, place the flour in a shallow dish. Heat oil in a wok till hot. Toss the chicken wings in the flour, tapping off the excess and slide them into the oil.
  5. Fry on a low heat for about 10 mins, turning occasionally, until the wings are golden brown and cooked through. Drain on kitchen paper and serve immediately.


Crisp and moreish!


This post is linked to Cook Your Books Event #22 hosted by Joyce of Kitchen Flavours

Thursday, April 9, 2015

Oven Fried Chicken

Let's have something sinful today....Fried Chicken! It looked really crisp and golden aren't they? Can you believe it that they were baked in oven instead of deep frying in hot oil?! 


The key ingredient is marinating the chicken pieces in buttermilk which attributes a tender and succulent texture. Coating with crushed cornflakes gives a golden hue to this oven fried chicken! 

They are best served immediately after baking to enjoy its crisp while still hot. They will lose its crisp if left in room temperature for too long :D


Ingredient
  • 2 cups buttermilk
  • juice of 1/2 lemon
  • 1 tbsp tabasco
  • 1/2 onion, sliced
  • 5 sprigs thyme
  • 3 cloves garlic, crushed
  • 1 tsp salt
  • 1/2 tsp black pepper
  • 1 large chicken, cut into 6 chunks
Coating:
  • 2 cups crushed corn flakes
  • 1/2 cup grated Parmesan cheese
  • 2 tsp fresh thyme leaves
  • 1 tsp salt

Method
  1. In a large bowl, combine buttermilk, lemon juice, tabasco, onion, thyme, garlic, salt & pepper.
  2. Pat dry the chicken with paper towels and add to the bowl and toss to coat well. Cling wrap and chill for at least 3 hours.
  3. Preheat oven to 200 deg cel.
  4. In a shallow pan, mix the corn flakes, parmesan cheese, thyme and salt.
  5. Remove the chicken from the buttermilk mixture and drip off any excess.
  6. Coat each piece of the chicken thoroughly in the corn flake mixture, pressing down firmly to ensure the dry mixture sticks to the chicken.
  7. Place the coated chicken on the wire rack over a lined baking sheet to catch any drippings.
  8. Bake for 45mins or until golden brown and cooked through.

I've forgotten to snap a picture on the inner section >.<..But I can tell you that they were really juicy and tender! 


Brown Gravy for mashed potatoes....click here for recipe


This post is linked to the event, Little Thumbs Up organised by Bake for Happy Kids and My Little Favourite DIY, and hosted by Diana from the Domestic Goddess Wannabe 

Monday, April 6, 2015

Stir-fry Pandan Chicken

Love pandan chicken but finding the wrapping of chicken pieces with pandan leaves tedious? Try this straight forward and fuss free stir-fry version! Equally delicious and guarantee that you won't be able to stop munching away this yummylicious little drumlets infused with pandan flavour and sweet spicy sauce :D


the marinade ingredients

toss the marinade thoroughly with drumlets and chilled overnight

finger-licking good! 

Ingredient
  • 12 chicken drumlets, skin removed
  • 4 pandan leaves, cut and lightly crushed
  • 3 coriander roots, rinsed
  • 5 cloves garlic
  • 1/2 tsp pepper
  • 3 tbsp gula melaka (thai palm sugar), finely chopped
  • 1 tbsp Thai sweet chilli sauce
  • 1 tbsp fish sauce
  • 2 tbsp coconut milk (1 tbsp coconut powder dissolved in 2 tbsp water)
  • 2 tsp Worcestershire sauce
  • 1/4 tsp salt

Method
  1. Cut the edge of drum let and pull the meat down from the bone and shape like a chicken stalk.
  2. In a small food processor, blend coriander roots, garlic, pepper, palm sugar, chilli sauce, fish sauce, coconut milk and Worcestershire sauce until smooth. Add in salt to taste.
  3. Place drumlets and pandan leaves in a ziplog bag. Pour in the marinade. Seal the bag and shake the mixture to ensure the drumlets are well coated with the marinade. Chill for at least 4 hours or overnight in fridge.
  4. Bring the drumlets to room temperature before cooking. Heat 1 tbsp oil in pan. Add in drumlets together with the marinade and stir fry for 2 mins. Cover with lid and cook over low heat for 10 mins. 
  5. Open lid, the base of the drumlets should be well browned. Flip over the other side and cook till browned.
  6. Stir briefly till gravy reduced and thickened but not too dry. Dish up and serve immediately.

This post is linked to the event, Little Thumbs Up organised by Bake for Happy Kids and My Little Favourite DIY, and hosted by Diana from the Domestic Goddess Wannabe 


Friday, April 3, 2015

Galangal Chicken

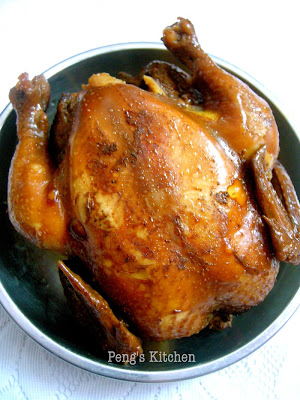
This is not the usual soy sauce braised chicken. This chicken dish is deeply infused with galangal,  tasted quite similar to Teochew braised duck except that this Galangal Chicken is much lighter in taste. Cooking process is also much simpler compared to braising a whole duck! If you like braised duck you will definitely like this wholesome flavoured Galangal Chicken too!


Marinating overnight

After braising


Recipe ref : Catherine Han
Ingredient
  • 1 whole chicken
  • 1 1/4 tsp salt
  • 250ml water
  • 12 slices fresh galangal 
  • 1 star anise
  • 1 small pc cinnamon stick
Seasoning
  • 1 1/4 tbsp brown sugar
  • 2 tbsp light soy sauce
  • 1.5 tbsp dark soy sauce
  • 1 tsp red chilli pepper powder
  • 1/2 tsp five-spice powder

Method
  1. Rinse chicken, drain and pat dry. Rub with salt and set aside.
  2. In a bowl, combine light soy sauce, dark soy sauce and brown sugar. Stir till sugar dissolve. Add chilli pepper and five-spice powder and mix well. Pour the mixture over the chicken. Turn the chicken to coat with the marinade evenly. Cling wrap the bowl and chill overnight. 
  3. Fill a pot with water and place the chicken, breast side down, together with the marinade sauce.
  4. Put in star anise, cinnamon stick and galangal. Cover the lid and bring the sauce to boil. Lower heat and simmer for 20 mins.
  5. Gently flip the chicken over and continue to simmer for another 15-20 mins till thoroughly cook though. 
  6. Remove the chicken from the pot and leave to cool down slightly before slicing up. Pour the sauce over the chicken before serving.

This post is linked to the event, Little Thumbs Up organised by Bake for Happy Kids and My Little Favourite DIY, and hosted by Diana from the Domestic Goddess Wannabe 

Thursday, April 2, 2015

Wakame Egg Roll

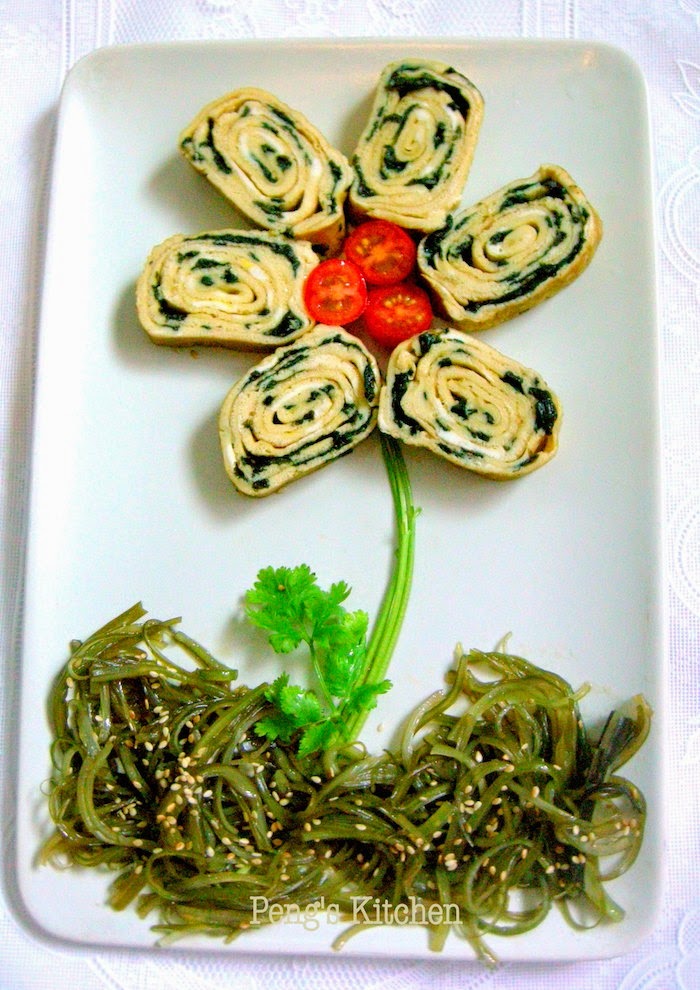
This is a Japanese egg roll tamagoyaki with a twist!  I adapted my usual tamago recipe and added extra  fresh wakame in between the layerings. With the added wakame it makes the rolling process slightly challenging and the roll was not as tight as it should be. I tried my best not to break up the egg roll while rolling it and at the same time trying not to overcooked it as may result a leathery texture. Luckily with some extra patience the egg roll turned out fine and lovely :D


Ingredient
  • 6 eggs
  • 1.5 tbsp sugar
  • 3 tsp light soya sauce
  • 2 tbsp rice wine
  • 1/4 cup Nori Wakame

Method 
  1. Rinse wakame about 5-6 times to reduce saltiness. Cut up the seaweed and set aside.
  2. Using a chopstick, stir the egg to combine. Do not beat vigorously. Stir in the seasoning. Over stirring will create too much bubbles in the mixture and may result wrinkle omelette.
  3. Lightly grease a heated rectangle cooking pan. Pour some egg mixture into the pan, an even thin layer will do. Tilt the pan to coat the base of the pan evenly. Sprinkle in some cut seaweed evenly over the surface. Cover the lid and cook for 1 min or less on low heat till the top is almost set. Roll up the egg to the left side of the pan.
  4. Shift the egg roll gently back to the right side of the pan. Pour in some egg mixture over the pan. Using a chopstick, lightly lift up the egg roll and let the raw egg run underneath. Again sprinkle some cut seaweed over.
  5. When the edge has set, roll up the omelette towards to the left pan again with the help of a chopstick and a spatula if necessary.
  6. Slide the egg roll towards to the right side of the pan again. Repeat the steps with the remaining egg mixture and cut seaweed.
  7. Leave the rolled omelette to cool before cutting in pieces.

Wednesday, April 1, 2015

Wakame Prawn Omelette

I got a pack of fresh wakame from my mother-in-law and happened to come across this recipe by Shirley Tay. Decided to give this a try since my kids love prawn and eggs! As the fresh wakame is rather salty, it has to be rinsed a few times to reduce the saltiness. Not much seasoning is needed while cooking the omelette, just add some salt sparingly with dash of pepper and sesame oil. Fresh, crunchy prawn embedded in the flavourful omelette which the kids love to bits and disappeared in no time when served.


Recipe ref: Shirley Tay of Luxury Haven
Ingredient
  • 5 eggs
  • 10 medium prawns, shelled and deveined
  • 1/4 cup Nori Wakame
  • 1 clove garlic, minced
  • 1 tsp olive oil
  • salt & pepper to taste
  • 1 tsp sesame oil
  • chopped spring onion for garnishing

Method
  1. Marinate prawns lightly with salt & pepper, set aside.
  2. Rinse wakame about 5-6 times to reduce saltiness. Cut up the seaweed and set aside.
  3. Beat eggs with wakame, salt, pepper and sesame oil till well combine.
  4. Grease Happy Call Pan (HCP) with oil and sauté garlic till fragrant. Add prawn and fry till they are half cooked. Dish up and set aside.
  5. Pour egg mixture into HCP and add in prawns. Cover lid and cook on low fire for about 1 min until base is golden brown and top is slightly set. Loosen the edge with a spatula, close lid.
  6. Flip pan over and cook for another 1-2 min till golden brown.
  7. Flip pan again and turn off heat. Cool down slightly before slicing and serve.
Related Posts with Thumbnails