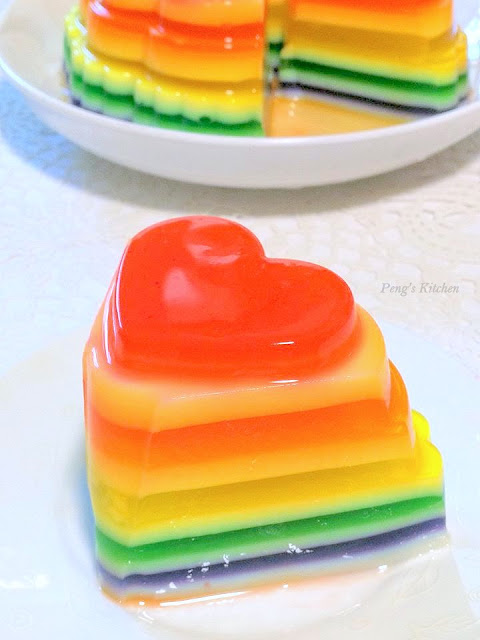
Revisiting my rainbow agar agar recipe made few years ago! Love the cute heart mould which I newly acquired. Instead of using coconut milk for layering, I've replaced with condensed milk this time round. Actually I did not do a good job today. Some of the layers smudge! arrrgghhh....some of the layers too thick resulting I've to skip 2 more layerings. *cry* Only consolation is that it dislodged beautiful onto the serving plate rather then breaking up into pieces. hahaha....
Colours Layer
- 1 packet 10gm agar agar powder
- 1200 ml water
- 200gm sugar
- 2 pandan leaves, knotted
- wilton colour paste - I've used 6 colours : violet, blue, green, yellow, orange & red
- 1 packet 10gm agar agar powder
- 1000ml water
- 250gm condensed milk
- 2 pandan leaves, knotted
Method
- Colours Layer : Place pandan leaves and water into a pot. Bring to boil and add in sugar and agar agar powder. Boil for 1 minute and turn off heat. Sieve mixture into a bowl. Discard pandan leaves. Place the bowl (covered) over a pot of hot water (double boil) to keep the mixture warm while preparing the milk mixture.
- Milk Layer : Place pandan leaves and water into a pot. Bring to boil and add in condensed milk and agar agar powder. Boil for 1 minute. Turn off heat. Sieve mixture into another bowl and discard pandan leaves. Place the bowl (covered) over a pot of simmering hot water (double boil) to keep the mixture warm.
To assemble 12 layers agar agar : milk, violet, milk, blue, milk, green, milk, yellow, milk, orange, milk, red (or reverse order if using the heart mould*)
- Measure 200ml of milk mixture and pour into a 8" x 8" pan. Leave it to set slightly but not harden. The surface will be sticky to feel. Use your finger gently touch on the surface to test out.
- Second layer : Measure 200ml of plain mixture and add the violet colour (use a toothpick to swap some colour paste and stir into the agar agar mixture, add more till the desired tone you prefer), stir evenly to dissolve the colouring. Gently spoon the coloured mixture over the milk layer (first layer). Leave to set slightly but not harden.
- Repeat Step 1 and 2 till the layers are completed (ending with a red coloured layer).
- Leave the whole jelly to cool down in room temperature before refrigerating till cold. Slice and serve!
* For the heart mould, each layer requires approx. 150ml of liquid.


No comments:
Post a Comment