Thursday, August 30, 2012

Cranberry Oatmeal Cookies

This is what I've baked for this year Teacher's Day, a small gift along with a pack of homemade cookies :)


Ingredients
  • 130gm plain flour
  • 1/4 tsp salt
  • 1/4 tsp ground cinnamon
  • 1/2 tsp baking powder
  • 1/2 tsp baking soda
  • 1/2 tbsp vanilla paste
  • 1.5 tbsp milk
  • 1 large egg
  • 110gm unsalted butter, room temperature
  • 70gm light-brown sugar
  • 50gm granulated sugar
  • 135gm rolled oats
  • 60gm dried cranberries
Method
  1. In a medium bowl, whisk together flour, salt, cinnamon, baking powder, and baking soda. Set aside. In a small bowl, whisk together the vanilla, milk, and eggs. Set aside.
  2. In the bowl of an electric mixer fitted with the paddle attachment, combine the butter with both sugars, and beat on medium speed until light and fluffy. Reduce speed to low, gradually add milk mixture, and beat well. Add the flour mixture, and beat until just combined. Remove bowl from the electric mixer, and stir in the oats and cranberries. Place dough in the refrigerator until firm, at least 2 hours or overnight.
  3. Shape 1 or 2 tablespoons of dough into a ball; place on lined baking sheets. Press with the bottom of a glass to flatten dough into 2-inch-diameter rounds.
  4. Bake in preheated oven at 180 deg cel for 15-18 mins until golden brown. Cool on rack before storing in air-tight container.
Recipe source : Martha Stewart

Tofu Longan

Unlike the Tofu Fah I've done the other time, this Tofu Longan is infused with longan syrup and sweetened with sugar. But the texture is as good as old-fashioned soybean pudding :) smooth and wobbling!!


To show my support 'Make & Eat Tau Huay Day' a fun event initiated by Alan of Travelling Foodies , I dressed up my humble plain soy pudding with a layer of black sesame paste!


Recipe adapted from Table for 2
Tofu Longan
Ingredient
  • 1 level Tbsp Agar-agar powder (8gm)
  • 1L water
  • 250gm sugar
  • 2 blades pandan leaf, tied into a knot
  • 1L thick unsweetened soy milk (I used Sobe Brand)
  • 150ml evaporated milk
  • 150ml canned longan syrup (from the longan can)
  • Canned longans
Method
  1. Prepare containers / jelly cups. Place 2 longans or more into each container.
  2. Cook sugar, 750ml water and pandan leaf until water boils.
  3. Mix agar-agar powder with 250ml water and pour into (2). Bring to a boil again, simmer for another 2-3 minutes. Turn off heat.
  4. Put in soy milk, evaporated milk and longan syrup. Mix well.
  5. Pour soy mixture into prepared containers.
  6. Let them cool down and set. Chill in fridge before serving.


This was a batch of Tofu Longan which I did last month for my family gathering which was very well received !! :) My cousins even requested for the recipe! :)


Hello Kitty Soy Pudding anyone?? Flavoured with strawberry paste :)


Saturday, August 25, 2012

Growing Fresh Mushroom

What is this? A super huge homegrown oyster mushroom! :) This is the latest craze of growing mushroom at home >.< I bought 2 logs of Oyster Mushroom and 1 log of Black Fungus. We were told that each log can grow between 3-4 cycles. But with my not so green fingers, mine does not grow very well compared to others whom have tried this mushroom growing experiment. Anyway I've taken some pictures on the growth of the mushroom, happy viewing ! :)


The one and only fresh oyster mushroom I've harvested and cooked!


Baked Oyster Mushroom on Toast with Truffle Oil
Creations by Peng's Kitchen
Ingredient
  • 1 slice wholemeal bread
  • 2 tbsp tomato sauce
  • 2 cloves garlic, minced
  • some fresh oyster mushroom, shredded
  • some grated cheddar cheese
  • 1 tbsp olive oil
  • 1 tsp dried parsley
  • salt & pepper
  • truffle oil

Method
  1. Roll bread flat with a rolling pin.
  2. Spread over tomato sauce evenly.
  3. Sprinkle over some cheddar cheese.
  4. Arrange oyster mushroom over the cheese. Sprinkle minced garlic and drizzle some olive oil over. Add salt & pepper to taste. Sprinkle over some parsley.
  5. Bake in preheated oven at 200 deg cel for 10-15mins until golden brown.
  6. Remove from oven and drizzle over truffle oil. Serve immediately!


Unopened Fresh Mushroom Logs :)
Ready for the growing process!! Spray the log a few times daily...


Suppose to grown by confine method but realise the buds started to appear inside the wrapper! So I removed the plastic wrapper and expose the whole log, back to open method...


Unsuccessful for Oyster Mushroom Log #2, I've dumped it into the bin after 10 days since its first harvest which did not grow very well :(


Oyster Mushroom Log 2 still looking very bald at Day 4!


The Black Fungus as at today, it is still growing quite smoothly :)


Can you see some purplish patch on the log? sign of growth


My son commented this looks so ugly!! Asking me not to cook this >.<"


not so bad looking after it has bloomed properly :)


Cranberry Cheese Bun & Custard Bun

I did this batch of bread few days ago just to clear the balance cream cheese after baking the Japanese Cheesecake :) This is my boy's favourite! Whenever he wants bread, he will definitely request for the cream cheese bun! :) I started preparing and kneading the bread at 8pm. By the time the buns were ready to send into oven at 10.30pm, my kids were already in their lalaland :)

What can be worst to see a tray of bread bursting and fillings all over the baking sheet?! Luckily mine did not encounter such disastrous :) I was making sure that the fillings did not smear at the edge and then pinched it tight to seal it. Chilling the fillings before hand does help to firm it up for shaping :)

After the buns were baked, I could not wait to savour one when it has cooled down! Ahhhhh freshly baked buns at 11pm + hahahaha.....Do not ask me how is it comparable to the infamous Barcook Cranberry Cheese Bread as I yet to taste theirs! But mine is as good as those neighbourhood bread shop, if not better!! Dear son even mistaken I bought them. When I told him I baked one he was so impressed!! '妈妈你好厉害!!' Lol


The round bun is filled with cheese, the oval shaped bun is filled with custard.


Recipe modified from Scrumptious Flavours
Ingredient
  • 250gm bread flour
  • 50gm sugar
  • 7gm instant yeast
  • 30gm beaten egg
  • 1/2 tsp salt
  • 130ml milk (I did not add all)
  • 10gm shortening
  • 10gm butter
  • dried cranberries
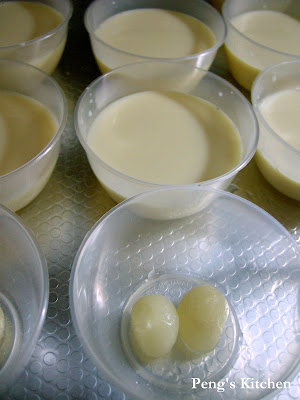
Fillings (beat till smooth & creamy, chill before use) : 125gm cream cheese, 40gm icing sugar, 1 tbsp lemon juice


Method
  1. Combine flour, sugar, yeast and salt, mix well.
  2. Add in egg and milk (left abt 2 tbsp), knead till a rough dough form. Gradually add in more milk if dough is too dry.
  3. Knead in shortening & butter until a smooth and elastic dough is formed, about 8-10mins.
  4. Cover and proof for 60mins until double in bulk.
  5. Punch down dough to release air and knead lightly. Divide dough into 8 portions* 60gm each and shape into rounds, rest for 10mins, covered.
  6. Roll out each dough and wrap with 20gm cheese fillings* and some cranberries and seal the edge tightly. Flatten slightly and place some cranberries on top. Cover and proof for another 60mins until double in size. Place a piece of baking paper over the dough follow by a baking tray, this is to ensure the buns remain flatten while baking.
  7. Preheat oven to 200 deg cel. Lower heat to 180 deg cel and bake for 20mins until golden brown. Cool on rack completely before storing.

Note : I divided the dough into 60gm each and wrap with 30gm cream cheese fillings each, yield 6 buns. Remaining 3 doughs I wrapped it with 1 tbsp custard each.


Recipe adapted from Carol's Blog
Ingredient
a) 200gm milk, 20gm sugar
b) 1 egg yolk, 20gm sugar
c) 50gm fresh milk, 10gm corn flour, 15gm cake flour
d) 10gm unsalted butter, 1 tbsp rum


Method
  1. Combine (a) and bring to boil.
  2. Combine (b) and mix well.
  3. Combine (c) until batter is free of lumps.
  4. Combine flour batter into the yolk mixture and mix well.
  5. Add in boiled hot milk (a) and whisk in, beating at the same time.
  6. Strain mixture and cook the mixture over low heat, whisking continuously until mixture is thick.
  7. Remove from heat and cool down slightly. Stir in butter and rum evenly.
  8. Transfer custard into an air-tight container and lay a plastic wrap over the surface to prevent a layer of skin from forming. Cool down and chill till use.

Savouring a custard bread for breakfast! Forever my #1 satisfied customer ^o*


Friday, August 24, 2012

Pumpkin Whoopie Pie : Free and Easy Bake-Along #31 - Theme : Whoopie Pies

I never heard of this pastry until I come across the recipe in my newly bought Nigella Lawson's cookbook :D and never thought of attempting it until this Bake Along event on Whoopie Pies >.< hehehe...

As usual, I do not want my kids to consume too much chocolaty stuffs as they seems to be coughing again so I google on recipes and found this Pumpkin Whoopie Pie! Sounds healthier with added nutritious pumpkin puree to the batter yah? ^o^ It also contribute natural sweetness and moisture to the pie which I'm able to reduce the sugar amount to some extent. What can I say about this pie? It just looks like a feetless macarons which all of you agreed and cookie in disguised with a cake like texture hahaha. Sounds like a weird combinations but definitely does not taste weird! LoL...hmmm only one issue...where should I categorise this recipe to? cake or cookie? >.<


The pie is quite huge, about 3" in diameter :)


Sandwiched with the frosty whipped cream, not too sweet, NICE!


Ingredient (18 cookies, 9 sandwiched pies)
  • 260gm plain flour
  • 1.5 ground cinnamon
  • 1 tsp baking powder
  • 1 tsp baking soda
  • 1/2 tsp salt
  • 1/2 tsp ground nutmeg
  • 1/2 tsp ground cloves (I omit this)
  • 60 gm unsalted butter
  • 60gm brown sugar
  • 60gm caster sugar
  • 80ml vegetable oil
  • 2 large eggs
  • 300gm pumpkin purée
  • 80ml milk


* Filling (enough for 6 sandwiched cookies) : 100gm Frosty Whip Cream Powder


Method
  1. Sift first 7 ingredients into large bowl. Using electric mixer, beat butter and both sugars in another large bowl until blended. Gradually beat in oil.
  2. Add eggs 1 at a time, beating to blend between additions. Beat in pumpkin puree.
  3. Add dry ingredients in 2 additions alternately with milk in 1 addition, beating to blend between additions and occasionally scraping down sides of bowl. Cover and chill batter 1 hour.
  4. Preheat oven to 180 deg cel. Line baking sheets with baking paper. Spoon 3 level tbsp batter onto baking sheet, spacing apart. Let stand for 10 mins.
  5. Bake for 20 mins until a skewer inserted cones out clean. Cool cakes completely on rack before sandwiched with filling. To store, place them evenly in single layers in a air-tight container.


Tuesday, August 21, 2012

Chinese Radish Cake

Which one you prefer, the dark one or the plain one??


Finally found a radish cake recipe which I like! The texture is not too soft nor hard like rock :) Luckily I did not reduce the recipe. The full recipe enough to last for us for 3 days as snack and breakfast :P


Recipe modified from My Baking Journal
Ingredient
  • 700gm shredded white radish
  • 3 tbsp dried shrimps, softened and roughly chopped
  • 2 tbsp fried shallots
  • 500gm rice flour
  • 60gm tapioca flour
  • 60gm wheat starch
  • 1600gm water
  • 3 tsp salt
  • 2 tbsp sugar
  • 1 tsp pepper
  • 1 tsp sesame oil

Method
  1. Bring a pot of water to boil, add shredded radish can cook for 5-8 mins until the radish are transparent and softened. Drain well.
  2. Combine all flour with 700ml water and mix well.
  3. Heat 2 tbsp oil in wok, add dried shrimps and fried till fragrant. Add in cooked radish and stir fry for 3 mins. Add in remaining 900ml water and seasoning and bring to boil.
  4. Slowly add in flour batter and cook over medium heat, stirring constantly, till mixture is thickened.
  5. Grease 2 8" square pan (I use 8" & 9"), ladle in batter and spread evenly. Steam over preheated steamer on high heat for 40mins until cook through. Cool completely before slicing.
  6. Coat cut radish cake with some rice flour and deep fry till golden brown. Serve with sweet sauce and chilli sauce.


Radish Cake in Dark Sweet Sauce
Ingredient (1 serving)
  • 250gm radish cake, cubed
  • 4 heap tbsp preserved radish, rinsed in water to remove excess salt
  • 1 tbsp minced garlic
  • 1 heap tbsp kicap manis, dark sweet sauce
  • 2 eggs, lightly beaten with pinch of salt
  • dash of pepper
  • handful of chopped spring onion

Method
  1. Heat 1 tbsp in pan, add preserved radish & garlic and fry till fragrant and lightly brown.
  2. Add in cubed radish cake and mix briefly. Stir in sweet sauce and coat the radish cake evenly.
  3. Drizzle in beaten eggs and pepper. Cook till egg is set. Toss in spring onion and give a quick stir. Serve at once.

White Radish Cake : I omit the dark sweet sauce and replace with 1 tbsp fish sauce, add a tbsp of crispy dry chilli sauce if you want it spicy, the rest the steps are the same :)


Related Posts with Thumbnails